21st Century Accounting Tutorials - Company Setup
Configure Company
When you create a company, the Configure Company displays automatically. If you want to continue later, you can close this window and then later select the company and run General Ledger/Configure/Company at any time.
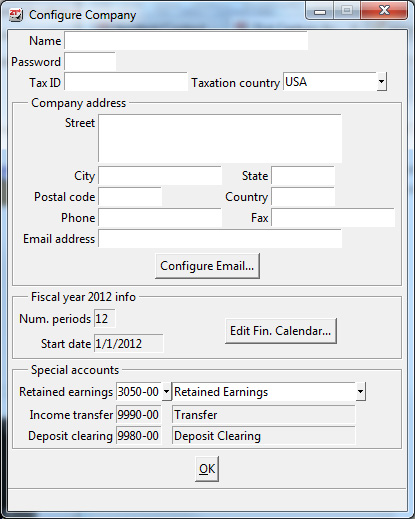
Configure Company window
Name. Type the company name and press Tab.
The initial default name is the name of the company's Windows folder. You can change it to the official name. The name appears on reports and forms printed from 21st Century Accounting.
Password. Press Tab.
Setting up a company password is optional. Once you set up a company password, any user who logs in must enter the company password to gain access to the company. If you want access control over certain functions, in addition to or instead of company-level access control, use the System/Access Control window to set up groups and their access to menu items.
Tax ID. Type your tax ID and press Tab.
You can enter the tax ID (employer federal identification number or EIN) in this field, if you wish. The Tax ID prints on W 2s.
Taxation country. Press Tab (for USA).
Company address. The address prints on invoices, statements, and, optionally, checks.
Street. Type the company address and press Tab.
City, State, Postal code, Country. Enter the appropriate information pressing tab after each entry.
Phone, Fax. Enter the appropriate information pressing tab after each entry until you get to the OK button.
Email Enter the email you would like to send emails from. To finish setting up your email, you will need to click the Configure Email button below. Please see the tutorial Email Invoices and Statements for further instructions.
The system created the previous as well as the current fiscal year and displays it as the “Start date” of the company’s financial calendar.
The completed Configure Company window looks like this.
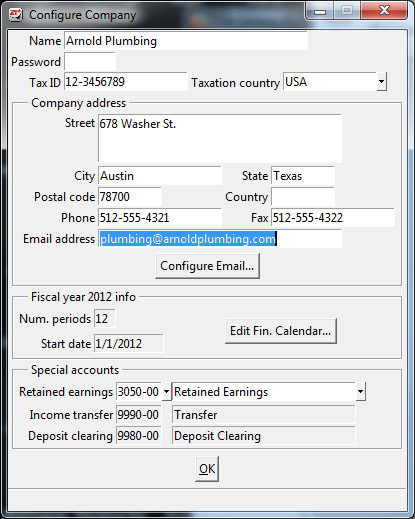
Configure Company window, completed
Click OK.
Proceed to the next lesson to Configure Email.
Back To Top | Back To Main Tutorials Page