21st Century Accounting Tutorials - Payables
Configure Vendors
In the Payables/Configure/Vendors window, you add your Vendors and assign control accounts, and, optionally, payment terms, categories, and default prompts.
Enter as Vendors the companies and individuals you do business with regularly on an Accrual Accounting basis.
Run Payables/Configure/Vendors.
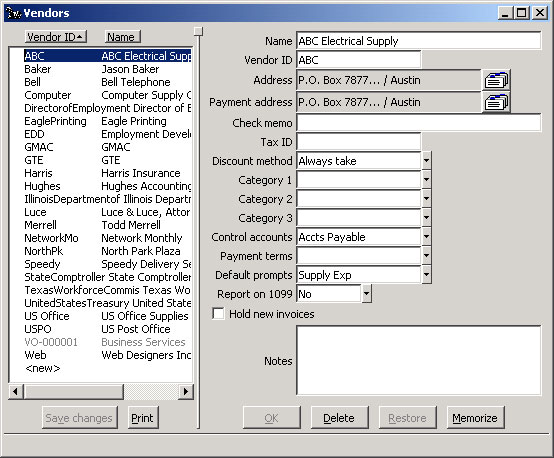
Payables: Configure Vendors window (Edit, Add)
Press F9 for a new entry.
The cursor moves into the Name field of a new Vendor window. You can press the F6 key to move back into the left pane.
Name. Type Gilbert| William S. and press the Tab key.
When you enter a Vendor's name, you can enter the last name first, separated from the first name by a vertical bar (|) if you want the name alphabetized by last name. The system displays names entered as Last| First in the Configure/Vendors window as Last, First in Vendor lists. The system prints such names as First Last on vendor checks.
Vendor ID. Type Gilbert and press Tab.
A unique alphanumeric ID identifies the Vendor for posting purposes and for reporting. When IDs are alpha, if you tab through this field, the system uses the name with no spaces for the ID. Once you have entered a numeric ID, the system uses the next number for the next Vendor you add.
Addresses. Press the Spacebar or click the address card. An address window opens where you can add (or edit) the address.
Type 456 Pillar St., Tab, San Antonio, Tab, TX, 78255, 3 Tabs, Bill Gilbert, Jr (at Contact), and click OK.
The system will fill in the Payment address with this address later.
Check memo. Press Tab.
If you wish, you can enter information for the Check memo that will print on the check and on the stub when you print checks for this vendor.
Tax ID. Press Tab to leave blank.
You can enter the vendor's tax ID for printing in the Recipient's Identification Number box on 1099s and on other reports. For individual 1099 vendors without a tax ID, enter the individual's social security number.
Discount method. Press Tab to accept "Always take."
The vendor discount options are
Always take (the default). The system takes the discount even if the discount date has passed when you pay the invoice.
Take if valid. The system takes the discount only if you pay the vendor invoice before or on the discount date.
Categories. Press Tab three times to leave blank.
Categories allow you to group Vendors (and customers and employees) for printing documents and for reporting. In Configure/Categories, you can set up any number of categories and then assign up to three categories to each Vendor in the Configure/Vendors window.
Control accounts. Select Accts Payable from the drop-down list.
You should assign a default set of control accounts to each Vendor from those you have set up. If you have more complex posting requirements – say you want to post a certain kind of transaction to a particular set of control accounts -- you can select the control account set for posting of a particular invoice when you enter the vendor invoice.
Payment terms. Press Tab to leave blank.
Optionally, you can select the payment terms for a Vendor from those you have set up.
Default prompts. Select Insurance Exp from the drop-down list.
You can set up any number of sets of prompt accounts to be displayed automatically for distribution when you enter Vendor invoices. You create a Name for each Default Prompts set and associate any number of distribution accounts with it. Default prompt sets allow you to customize the invoice distribution for different types of Vendors, to save you data entry time and help prevent distribution errors. You select a set of account prompts for each Vendor from those you have configured.
Report on 1099. Press Tab for "No."
You can indicate that a vendor requires 1099 reporting by selecting a 1099 box from the drop-down list. If you select a 1099 box for reporting payments to the vendor, payments to the vendor are posted to the vendor's records as 1099 payments and are reported in the designated box when you print the vendor's 1099. The supported boxes are those that appear on the 1099-MISC form.
Hold new invoices. Press Tab to leave the box unchecked.
Optionally, you can check the box to automatically put new vendor invoices on hold. You can change a vendor invoice's default status when you enter or update the invoice.
Notes. Press Tab to leave blank.
If you wish, you can enter free-form notes to further identify this party in data entry windows and on reports. This could be information you want to review when you enter transactions that reference this party, or it could simply be notes you want to record in addition to the information in the other fields.
Click OK and then click Save changes.
The completed Vendors window looks like this:
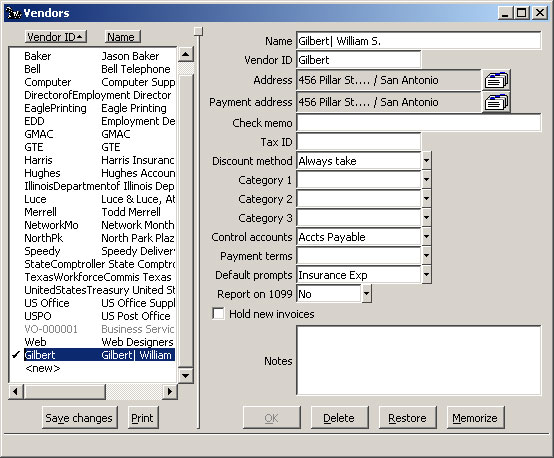
Payables: Configure Vendors window, New Vendor Saved
Notice that the system has filled in the Payment address with the Address you entered. You can edit the addresses, add Notes, change the Vendor name, ID, tax ID -- all at any time.
Back To Top | Back To Main Tutorials Page