21st Century Accounting Tutorials - Payables
Making Payments on Vendor Accounts
When payments to your vendors start falling due, you can select the vendors you want to pay during a "Create Payments" session and print their payment checks.
Use the Create Payments window to select a batch of vendor invoices for payment via printed checks issued from Payables. You select the invoices by due date or by discount date or you can select all unpaid invoices.
Select invoices by due date if you want to take advantage of any early payment discounts (based on payment terms) that are applicable.
Leave unchecked any vendors or any individual invoices you don't want to pay in this batch of checks. You can modify the amount of payment to apply to any invoice. You can print and review the list of invoices selected for payment. You can save and modify the payment list and print the checks at any time.
Run Payables/Create Payments.
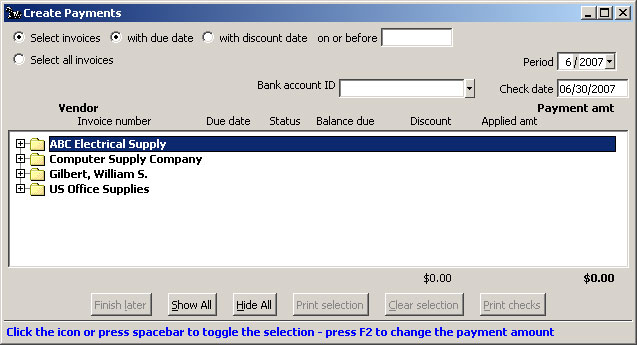
Payables: Create Payments window, Create New Payments
Select invoices with due date on or before. Enter the date 06/30/07 and press Tab twice. (If you check Select all invoices, the system will select all the displayed invoices for payment whether or not they are due.)
The system automatically selects for payment the invoices with due dates on or before the date you enter and with a status of Pay. (You will be able to UNselect any invoices you don't want to pay in this session.)
Bank account ID. Type 01 and press Tab.
You can also select the bank account for writing this check from the drop-down list.
Period and Check date. Press Tab three times to accept the Period and Check date.
As always, the posting period can be any open period. You can change the check date to the date you expect to print or distribute the checks. Check the date Help to see how to use shortcut keys to change dates.
With ABC Electrical Supply highlighted, press the Right-arrow key to display the vendor's invoices.
With ABC Electrical Supply highlighted, press the F2 function key to edit the Payment amount (the total payment) for this vendor.
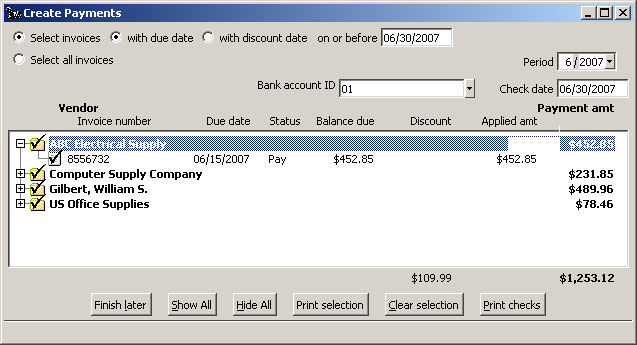
Press Esc.
Move the highlighting to the invoice for ABC, number 8556732 and press the F2 function key to edit the Applied amt (the amount of the check to apply to this invoice).
Pressing the F2 key has opened the amount field for editing. You can now edit the check amount to apply to the invoice, if you wish.

Press Esc.
Highlight Gilbert, William S., press Right-Arrow to see his invoices, and press Spacebar to UNselect him for payment in this session.
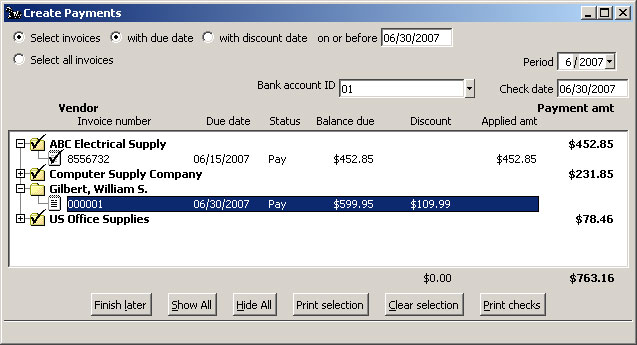
Payables: Create Payments window, Payment Selections Completed
The buttons at the bottom of the window show the actions you can perform on the payment selection.
Finish later. Use the Finish later button to save your work at any time and close the window. The next time you run the Create Payments command, the window displays the payment selection-in-progress and gives you an opportunity to continue working on it and to print checks.
Show All/Hide All. Use the Show All button to display all invoices for all selected vendors. The Hide All button collapses the list back into vendors only. (You can also click the plus or minus icon beside a vendor or press Right-Arrow/Left-Arrow to "open" and "close" the display of all the vendor's invoices.)
Print selection for a “batch listing” |
Print selection. Before you press the Print checks button to complete the payments as displayed, you can use the Print selection button to print a report that shows the selected vendors, invoices, and payment amounts shown in the window at the time you print the report. |
Use this batch listing as a payment selection record for review and approval before you print the checks to vendors.
Clear selection. Use the Clear selection button to unselect all vendors and start over.
Print checks. Use the Print checks button to print checks to the selected vendors in the amounts shown.
When you finish selecting invoices for payment, click the Print checks button in the Create Payments window.
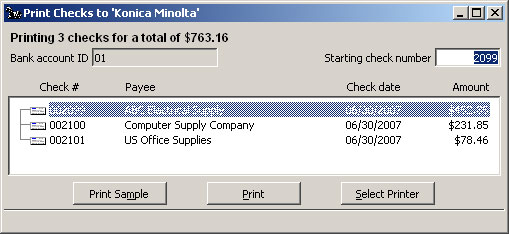
Payables: Create Payments Print Checks window
Review the check numbers, payees, dates, amounts, and check numbers. Put plain paper in your printer to print these sample checks.
Click Print in the Print checks to <printer name> window when you are ready to print the checks.
Review the printed checks.
Click Yes to indicate that the checks printed properly.
The system posts the payments to vendors and asks if you want to print a Check Register for this batch.
You can print a record for your files of the checks just printed if you wish. Click Yes or No.
Back To Top | Back To Main Tutorials Page