21st Century Accounting Tutorials - Bank Accounts
Import your Check Register text files into Excel.
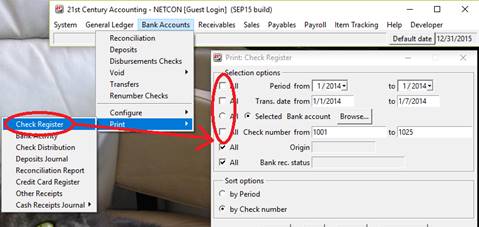
- Preview your check register in a way that displays the checks you wish to submit to the bank for the “Positive Pay” service. You can use the options to isolate the checks you’ve written by financial period, transaction date or check number. You can also produce the check register for each account individually if you desire.
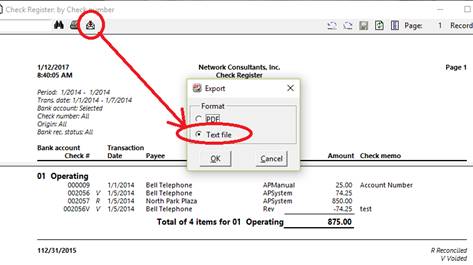
- Export the result to a *.txt file. To do this, within the Check register Preview window, at the top, you will find a small envelope button in the preview toolbar. Click the Envelope button, then select the option to produce a Text file. Make sure to save the file in a location that you can remember.
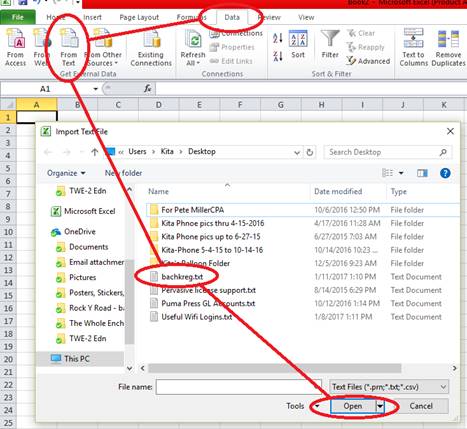
- Import to Excel. To do this, Open Excel to a new spreadsheet, and then click the “Data Menu” to access the import tools. Click the button to import a file from Text as illustrated. A window will pop up asking you to specify the file to be imported. Select the file that you just produced (The default filename for Check register exports is “bachkreg.txt”)
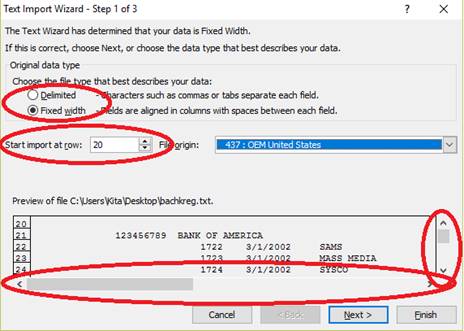
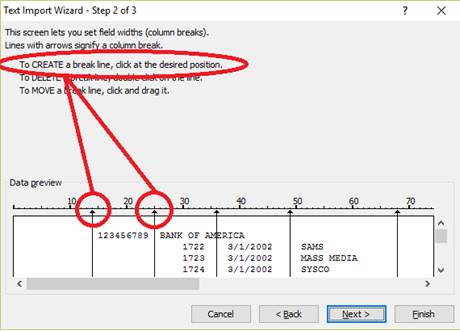
After clicking the “Open” button, an import wizard will open offering options for your import. Make sure that you select the “Fixed width” option, and then scroll down the preview of your data and select the first row you want in your Excel file. Now, click “Next”.
In step 2, click between the check number column and the account number as shown in the preview to indicate that you want to create a column for the account number. Then click next.
Disregard the last step in the wizard and click “Finish”.
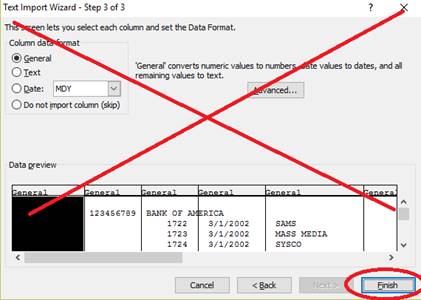
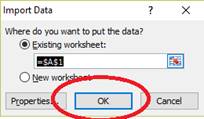
Place the result as suggested by the wizard and click “OK”:
- Modify the spreadsheet. Within the resulting Excel file, click into the cell that contains the account number of your checking account. You can quickly copy the account number into each cell in the column by grabbing the “auto-fill” button which appears as a dot at the lower right side of the selected cell as circled in the illustration below. You may also want to change the top line of each column to label the contents of the columns below the data. You may also wish to remove empty or irrelevant pieces of information.
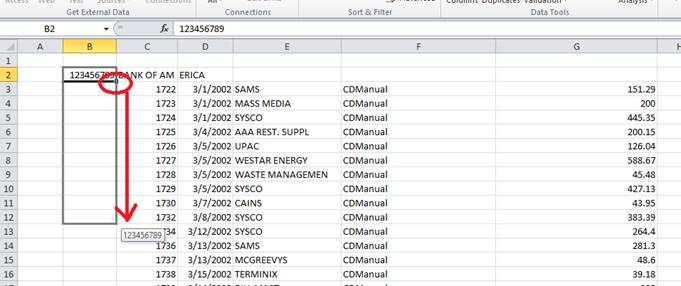
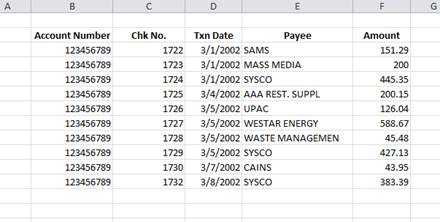
- Save your file and present the result to your bank. The file you present will look something like the illustration below after manipulation. You should then save the file as *.csv or as *.xls per the instructions of your bank. Contact your bank about the process of presenting the file to them.
Back To Top | Back To Main Tutorials Page