21st Century Accounting Tutorials - Company Setup
User IDs
THE USER ID AND ACCESS CONTROL SETTINGS APPLY TO ALL COMPANIES, INCLUDING YOUR TUTORIAL COMPANY. DO NOT ACTUALLY SAVE YOUR CHANGES FOR THIS TUTORIAL IF YOU DO NOT WANT A USER ID CALLED SYSTEM ADMINISTRATOR. Or you can do the following two tutorials, reverse your Access Control settings, and then delete the sysad User ID.
Use System/User IDs and System/Access Control if your company requires different levels of security for different employees. You can set up users or groups of users and control their access to an entire application (such as System, General Ledger, or Payables) or to individual commands (such as Customize Windows, General Journal, or Create Payments). Access Control allows you to prevent unauthorized access to confidential company information.
A user who belongs to more than one group will be denied access to all commands to which access has been denied in all groups to which the user belongs.
The following steps use an example to show you one path to activating access control for your company. The example demonstrates how to deny access to Customize Windows to all ordinary users while giving the system administrator access to the entire system. This is just an illustrative example. You must determine your own security configuration requirements.
The order in which you perform the tasks described may differ from one company to another, depending on the complexity of a company's security requirements and the size of the staff.
Run System/User IDs to set up IDs for the people who use 21st Century Accounting.
(Or, you can run System/Access Control, select the Group Membership tab, and press the Add User button.)
Press F9.
Now add a user with the following settings: Press F1 at each field to see how the option works for the user.
User ID. sysad
Password. 13579
Name. System Administrator
Delay (in seconds). Press tab.
Keypad mode. Tab.
Keypad mode lets you use the Enter key (in addition to the Windows-standard Tab key) to move through data entry screens. When you select this option and login with this User ID, pressing the Enter key after you type data into a field will enter the data and move the cursor to the next field.
Implied decimal in currency. Tab
Persistent report options dialog. Tab
Remember invoice distribution prompts. Tab
Auto select most recent company. Tab
Display accounting integrity warnings. Tab
Notes color. Tab.
Language. Tab.
Click OK and Save changes.
Your completed User ID looks like this.
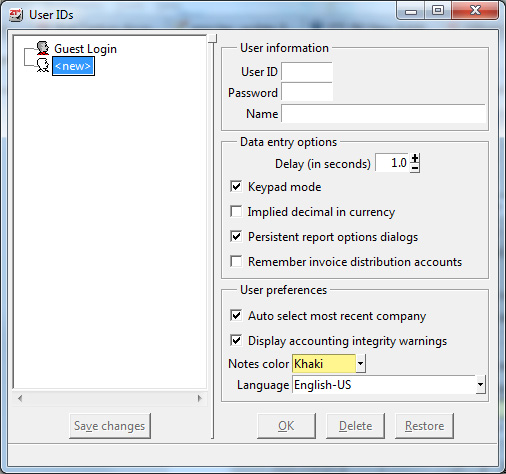
User IDs window
Proceed to the next lesson to set up Access Control.
Back To Top | Back To Main Tutorials Page